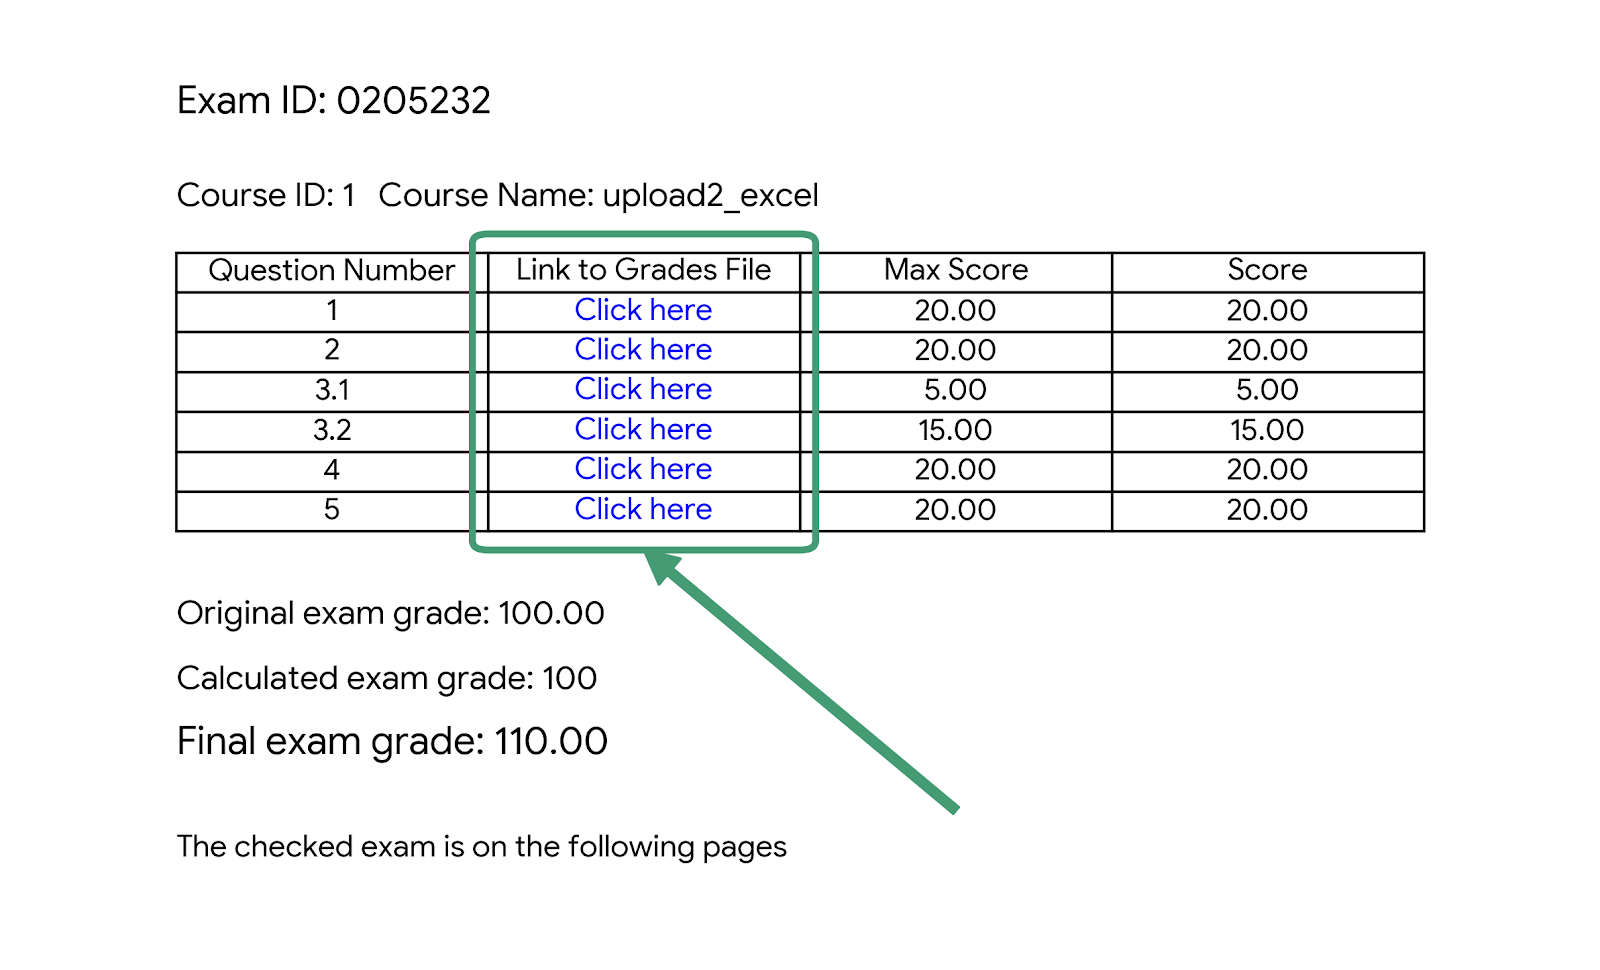
The examiners can, on the test screen, upload Excel and Word files from their computers directly to the exam questions of the examinees.
Uploading these files allows you to upload a file containing the details of the test and comments to the examinee such as Excel tables and rich explanations in Word; The process adds another dimension of transparency to the examinees and thus streamlines the appeal process and saves unnecessary appeals.
Only Excel and Word files can be uploaded up to 20 MB per file.
Here are the steps to follow to upload files to a question:
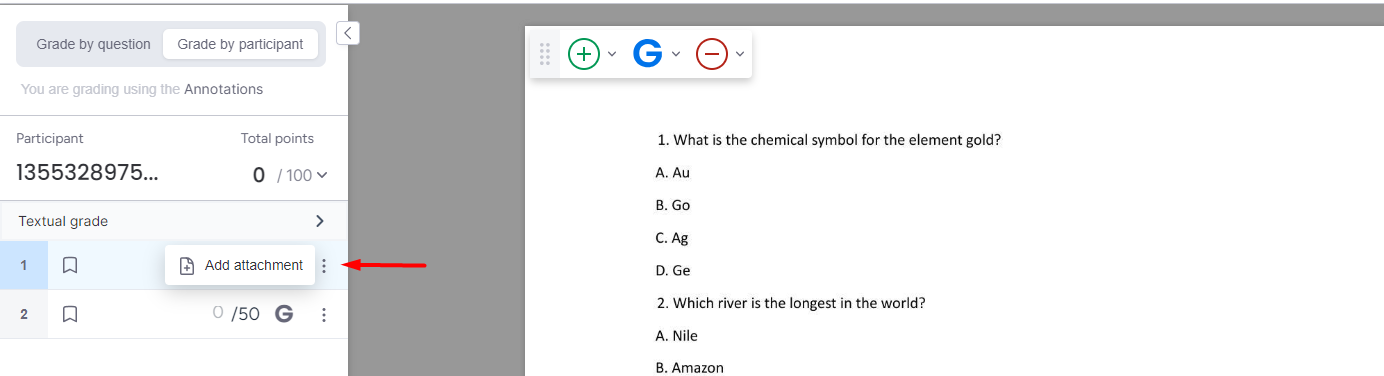
Click on the 3 dots next to the relevant question and then on "Add attachment":
In the pop-up screen, click on "Click to upload", and select the desired file from the computer:
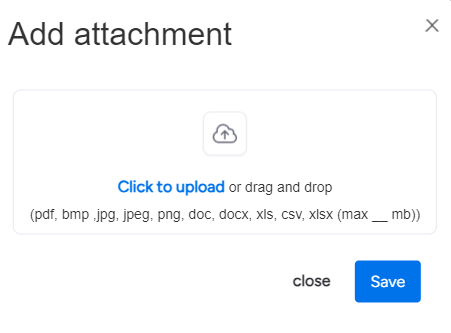
Alternatively, you can drag the file from your computer.
pay attention:
1. Only Word and Excel files can be uploaded
2. The file size is limited to 20 MB!
After selecting/dragging the file, click the upload file button:
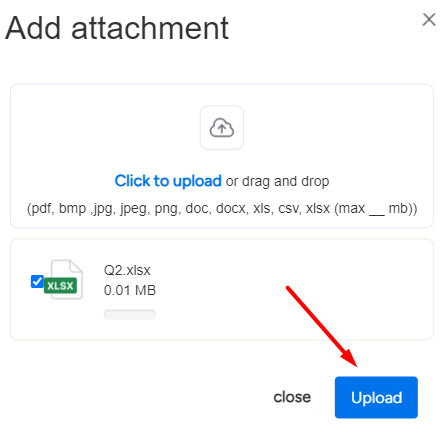
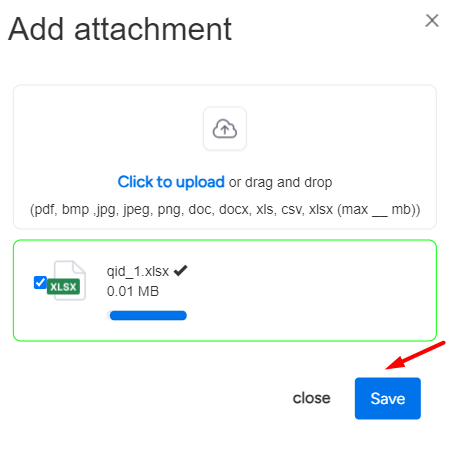
Once the progress bar has filled up, the save button will be available. Click to save:
To verify that the file has been uploaded, click on the 3 dots next to the relevant question and then you can see that "Delete attachment" is written:
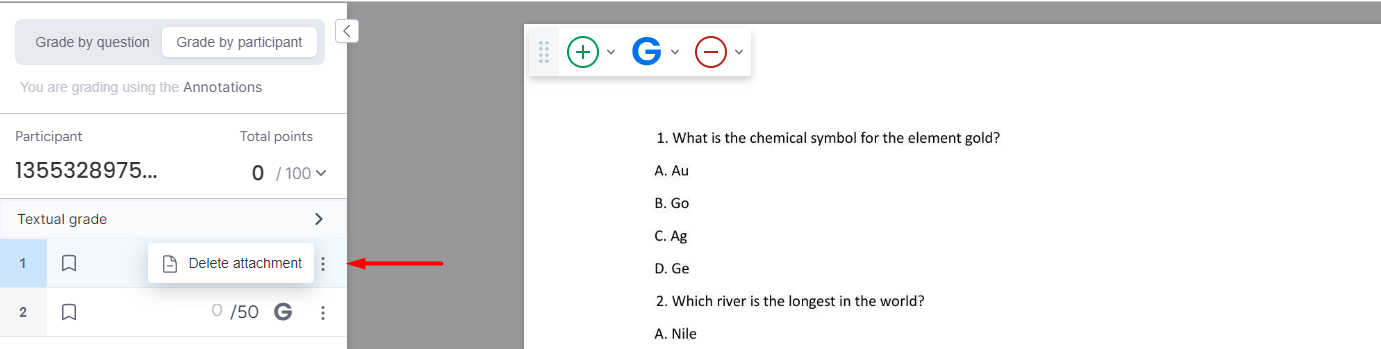
To remove an uploaded file, click on "Delete attachment" (as shown above) and in the pop-up window click on the delete icon:
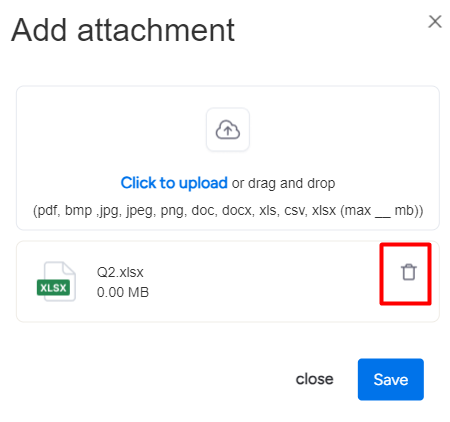
After that, exit the panel by clicking "Close".
And what does it look like on the examinee's side?
For each question to which a file has been uploaded, a link will be added on the summary page for the student that will allow the document to be downloaded to the computer.