For students who failed to submit the exam on time, there is an option of late submission, which allows the uploading of backup files from the student's computer.
Late submission will upload additional files as well, such as Excel and videos.
Activating Late Submission- Video Guide
Watch the following video to learn how to enable late submission mode and see how it appears from the student's perspective.
Step-by-Step Instructions:
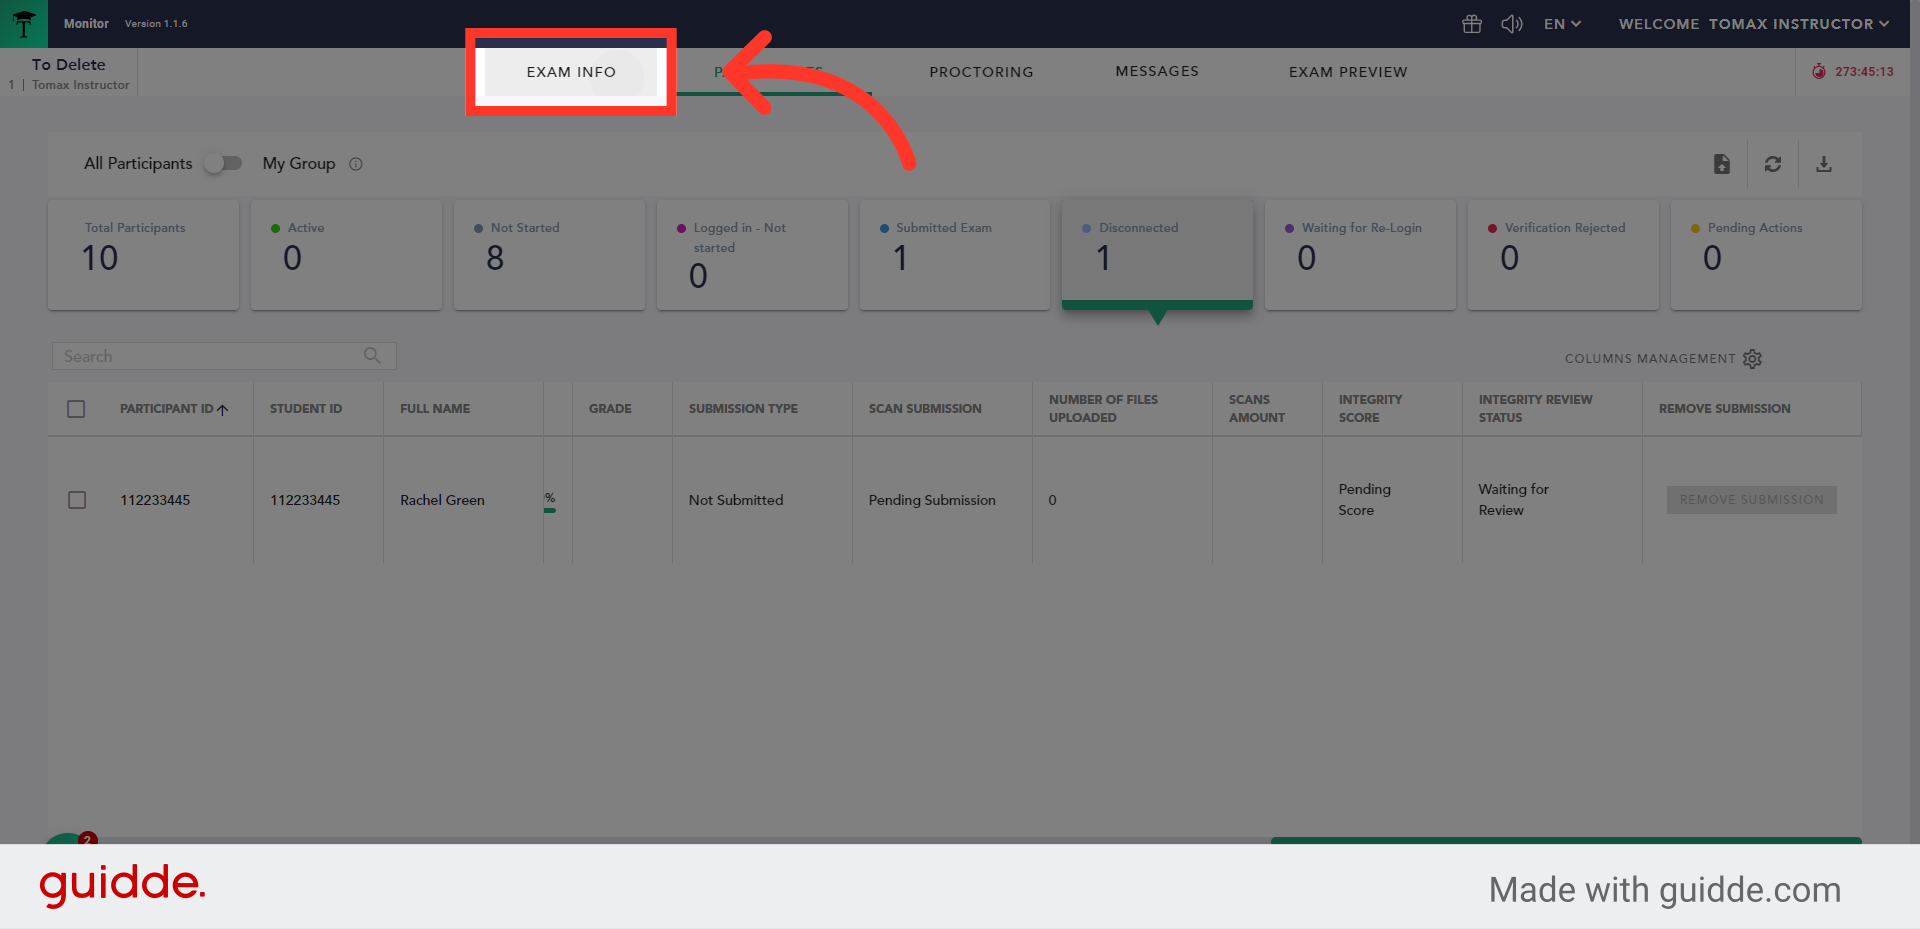
1. In the Exam Monitor go to "Exam info"
Click the "Exam info" tab to view the exam details.
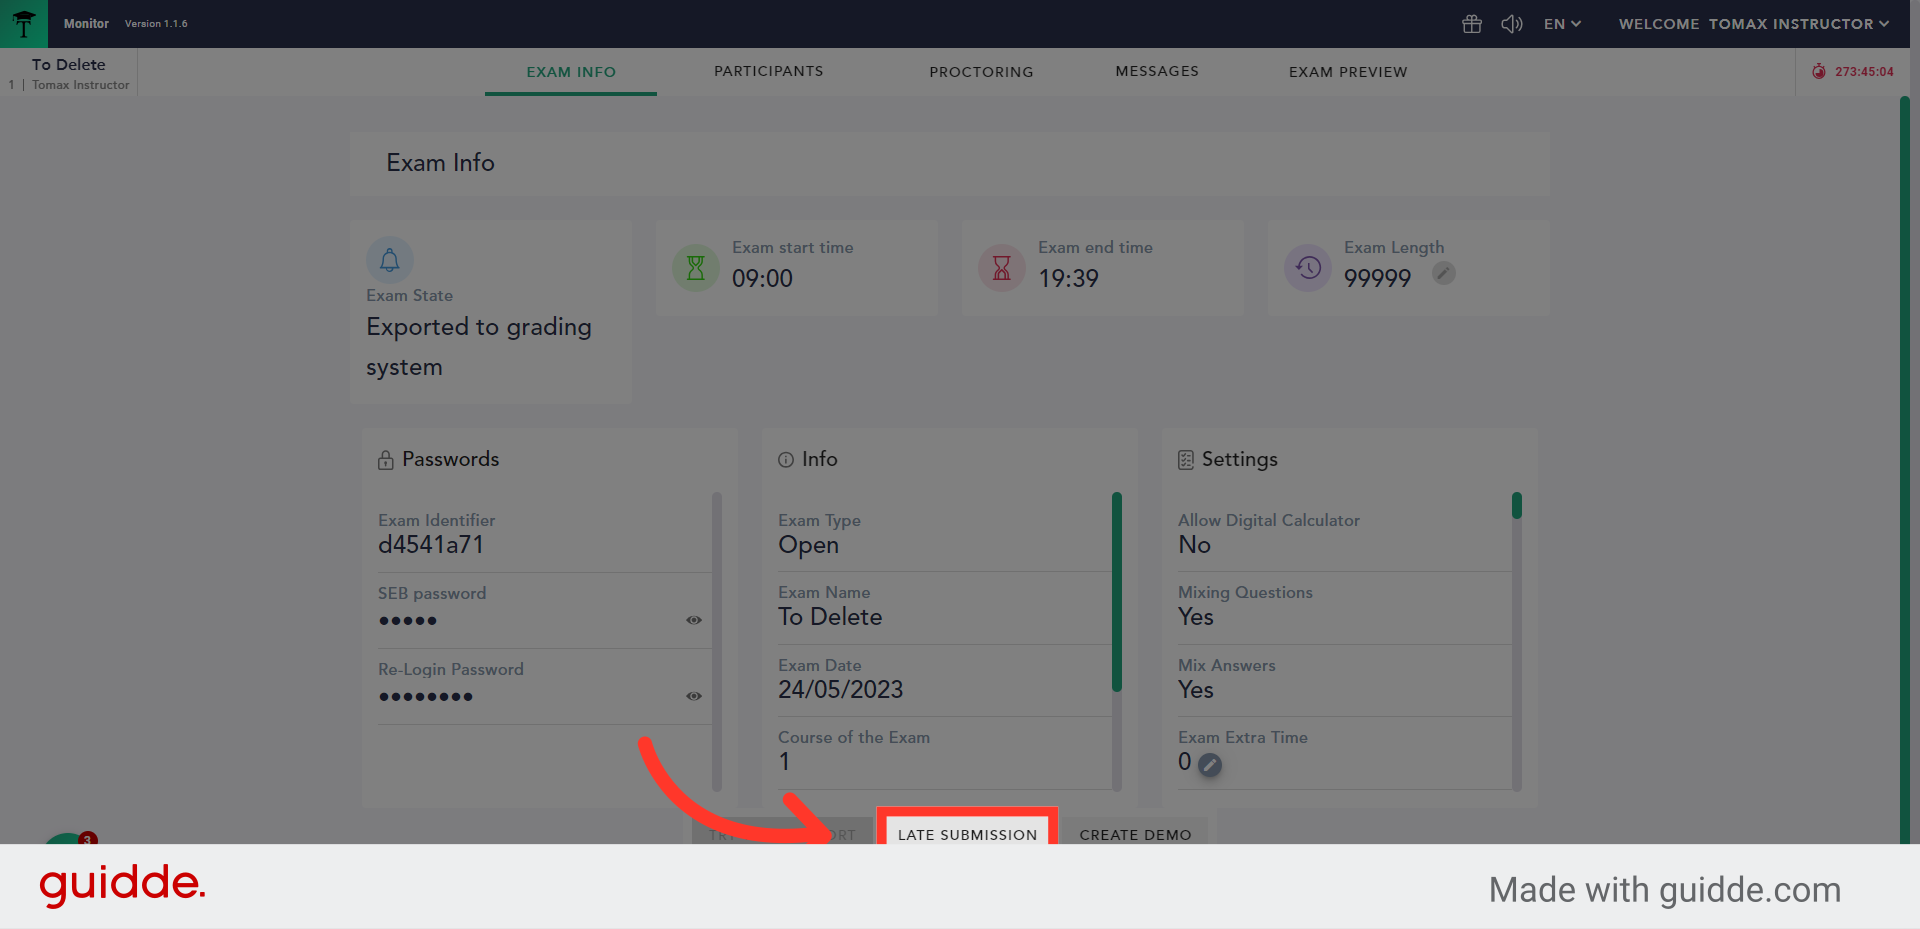
2. Click "Late Submission"
Click the "Late Submission" button to set the time frame in which late submission can be made
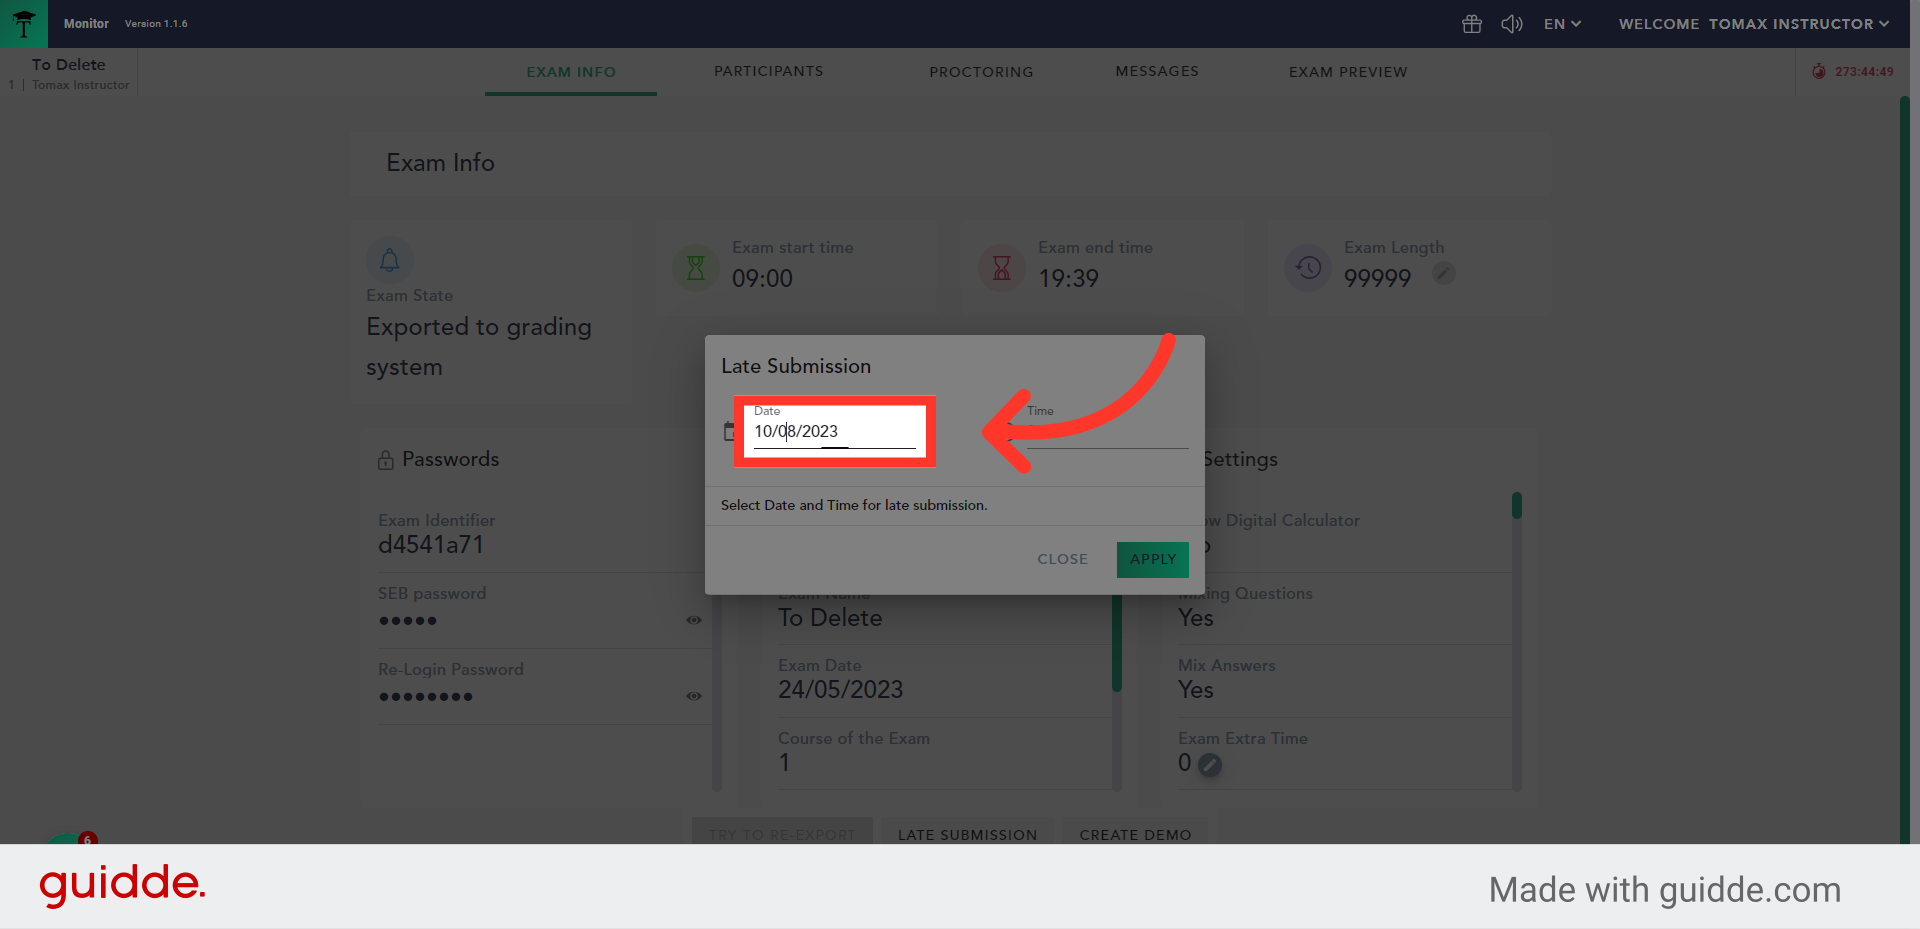
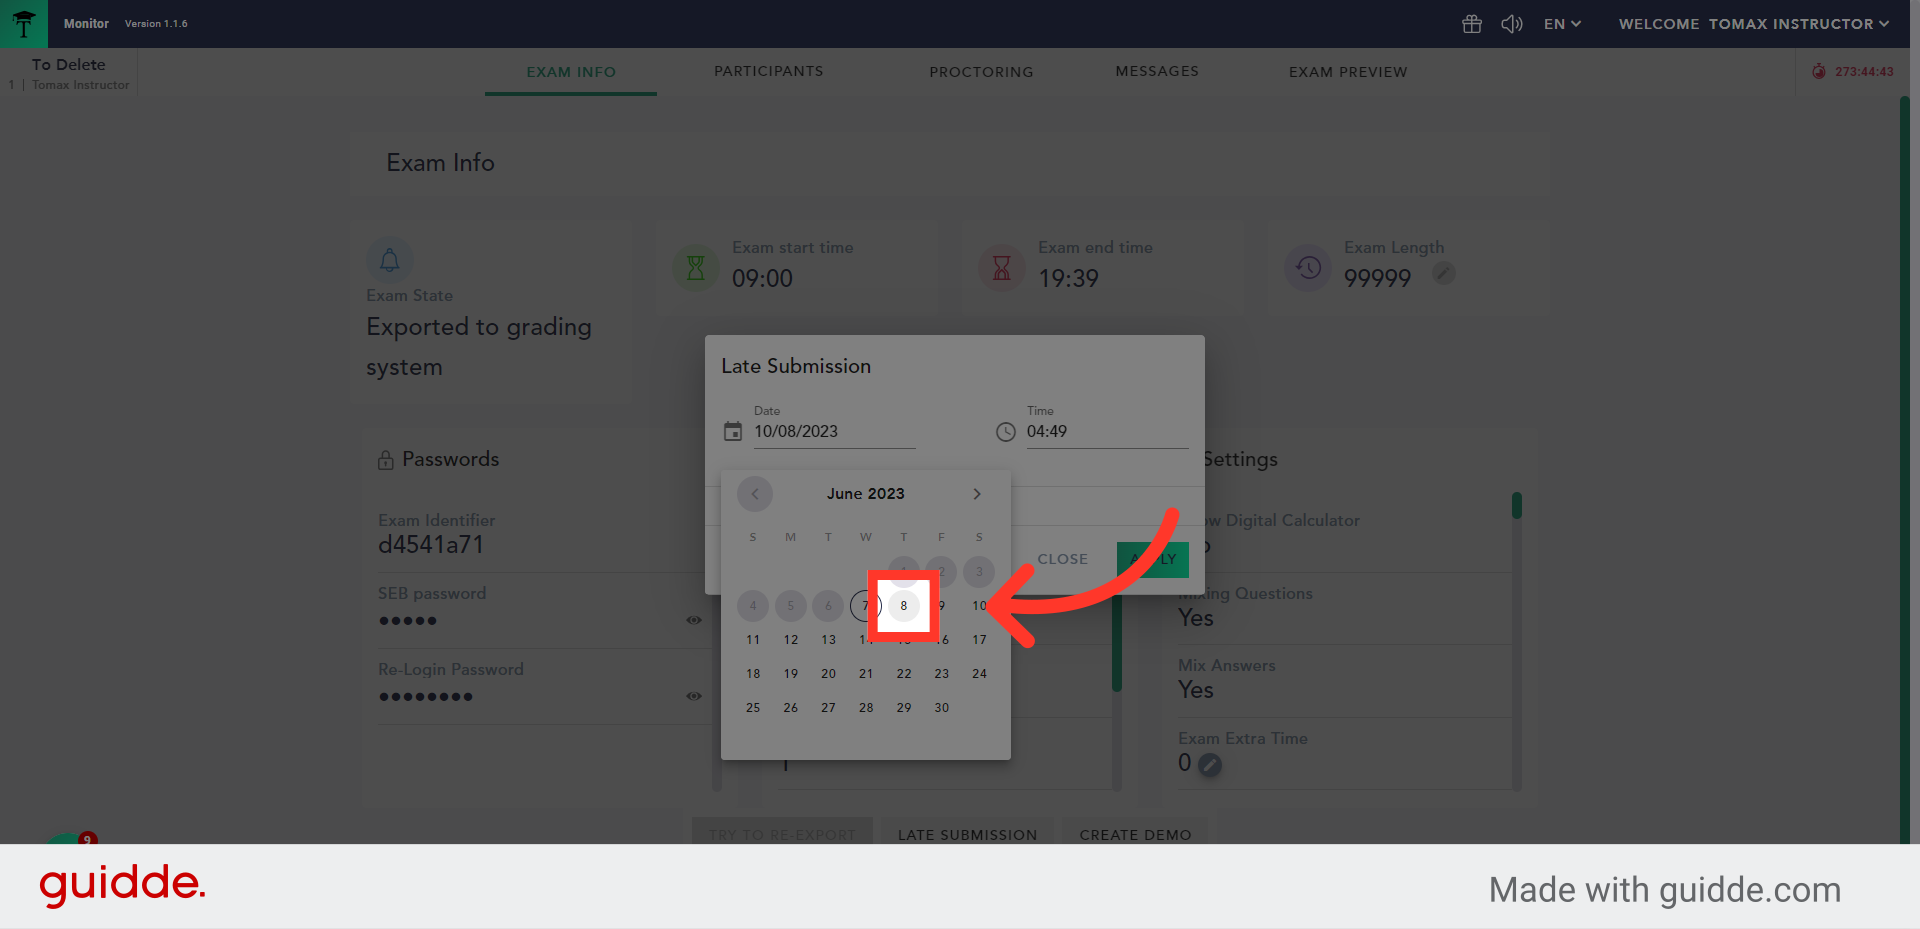
3. Click the date picker
Select the date of the exam.
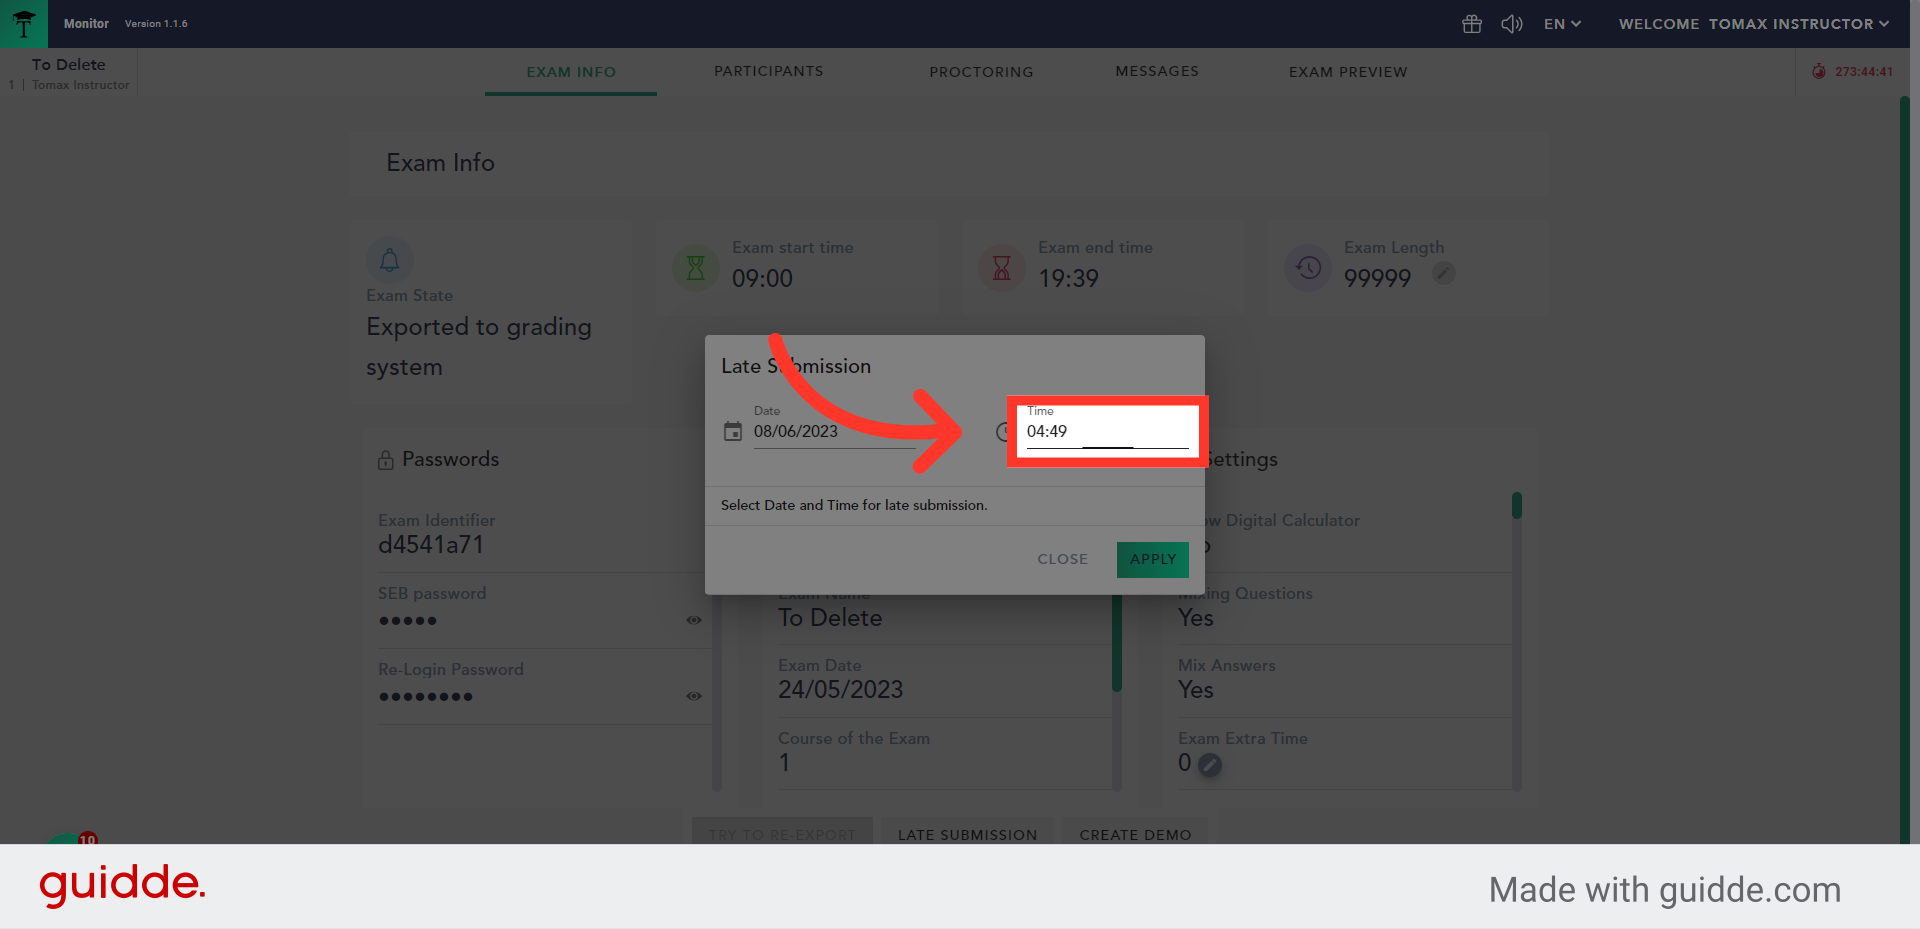
4. Set the required end date
Set the required end date
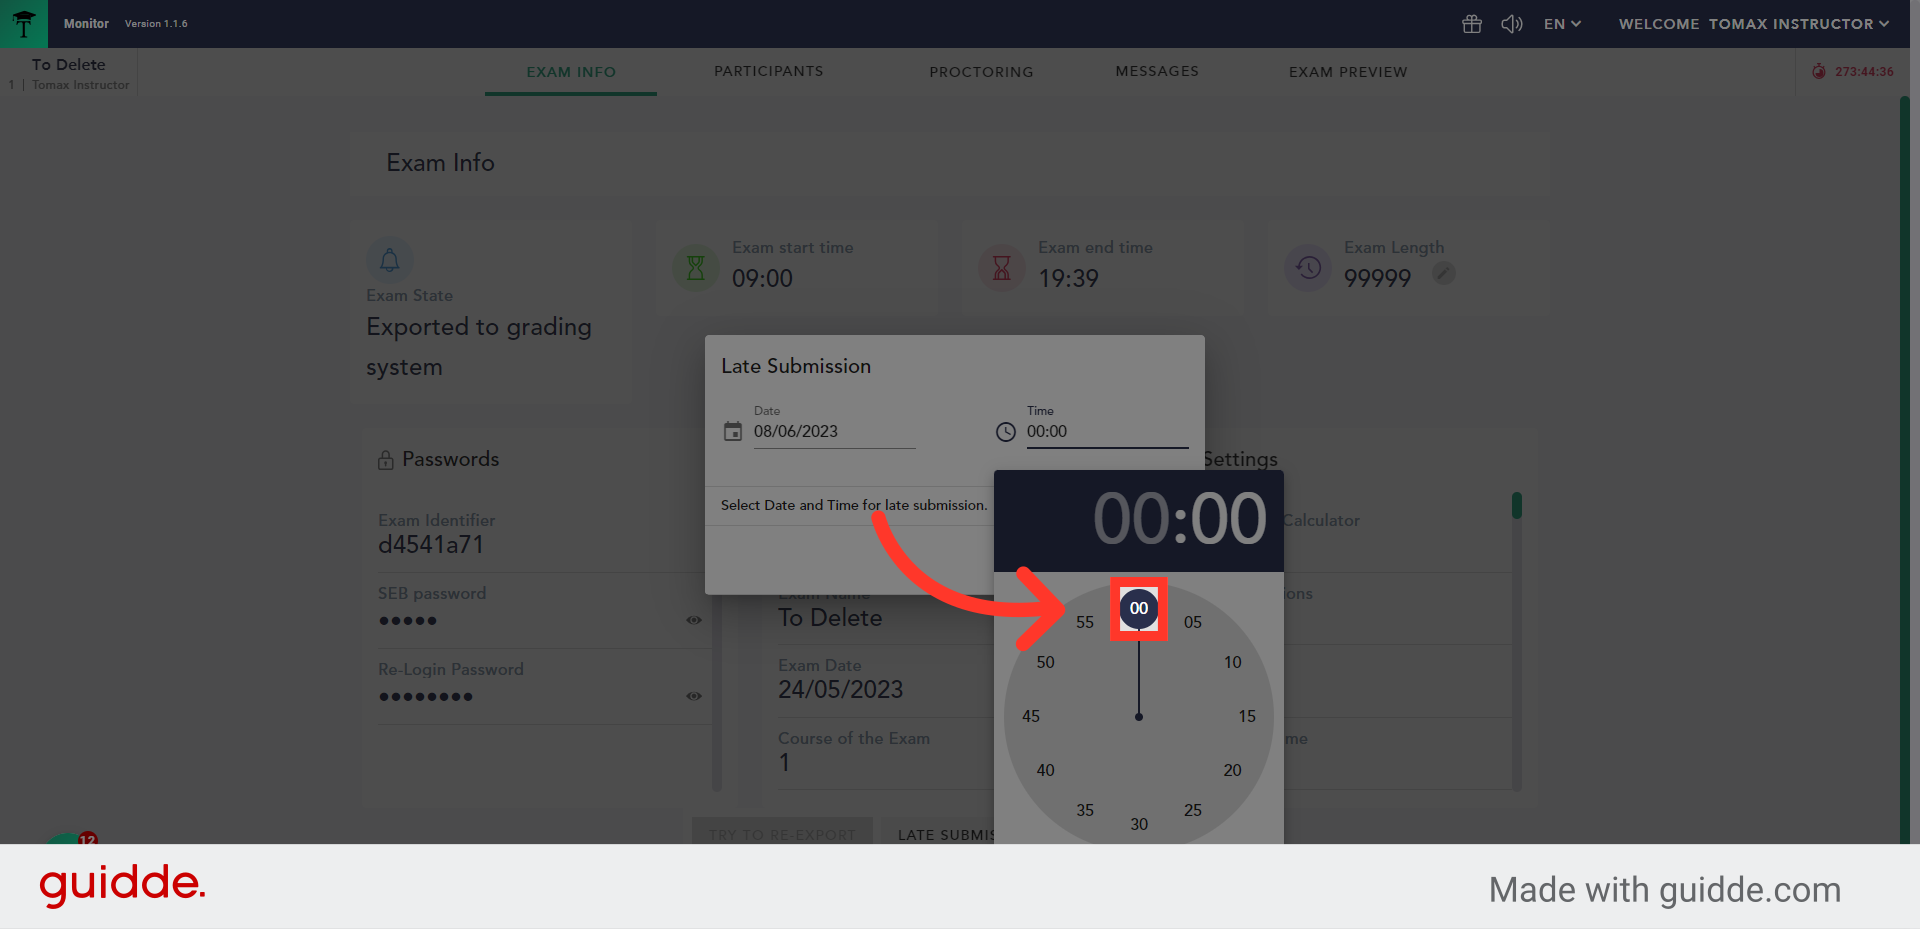
5. Click on the time picker
6. Set the closing time
Set the closing time
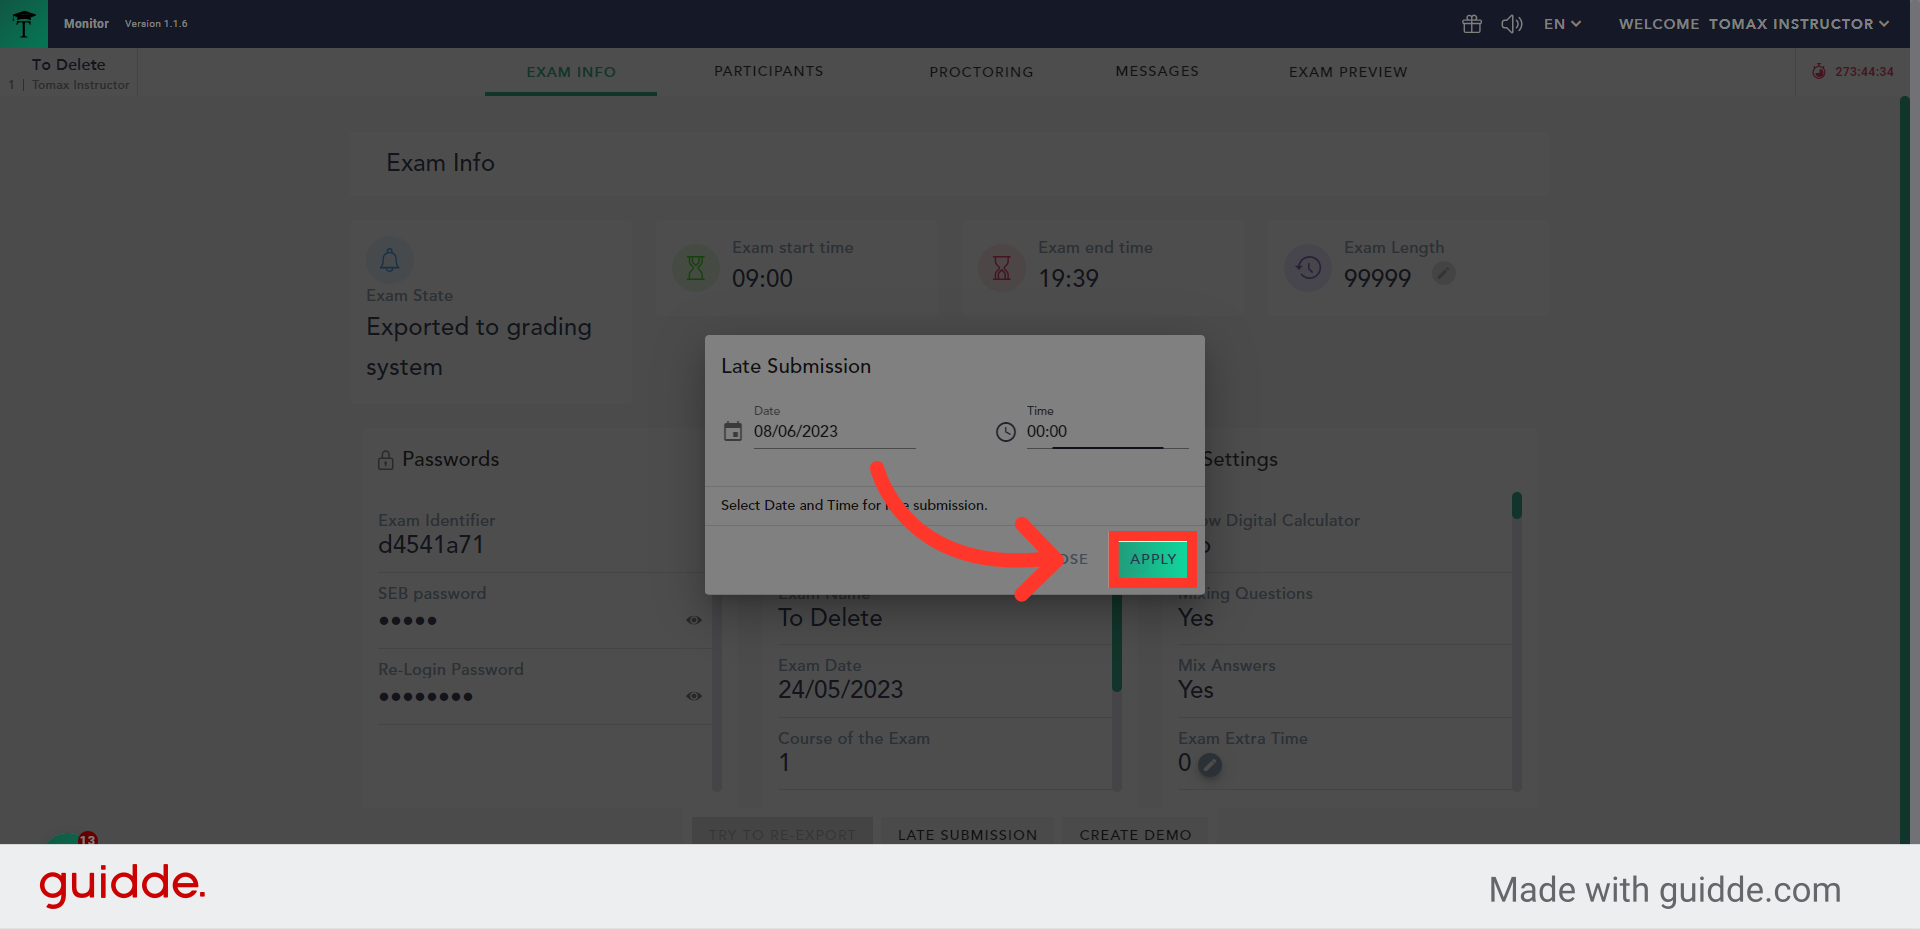
7. Click "Apply"
Click the "Apply" button to save the changes.
Student side
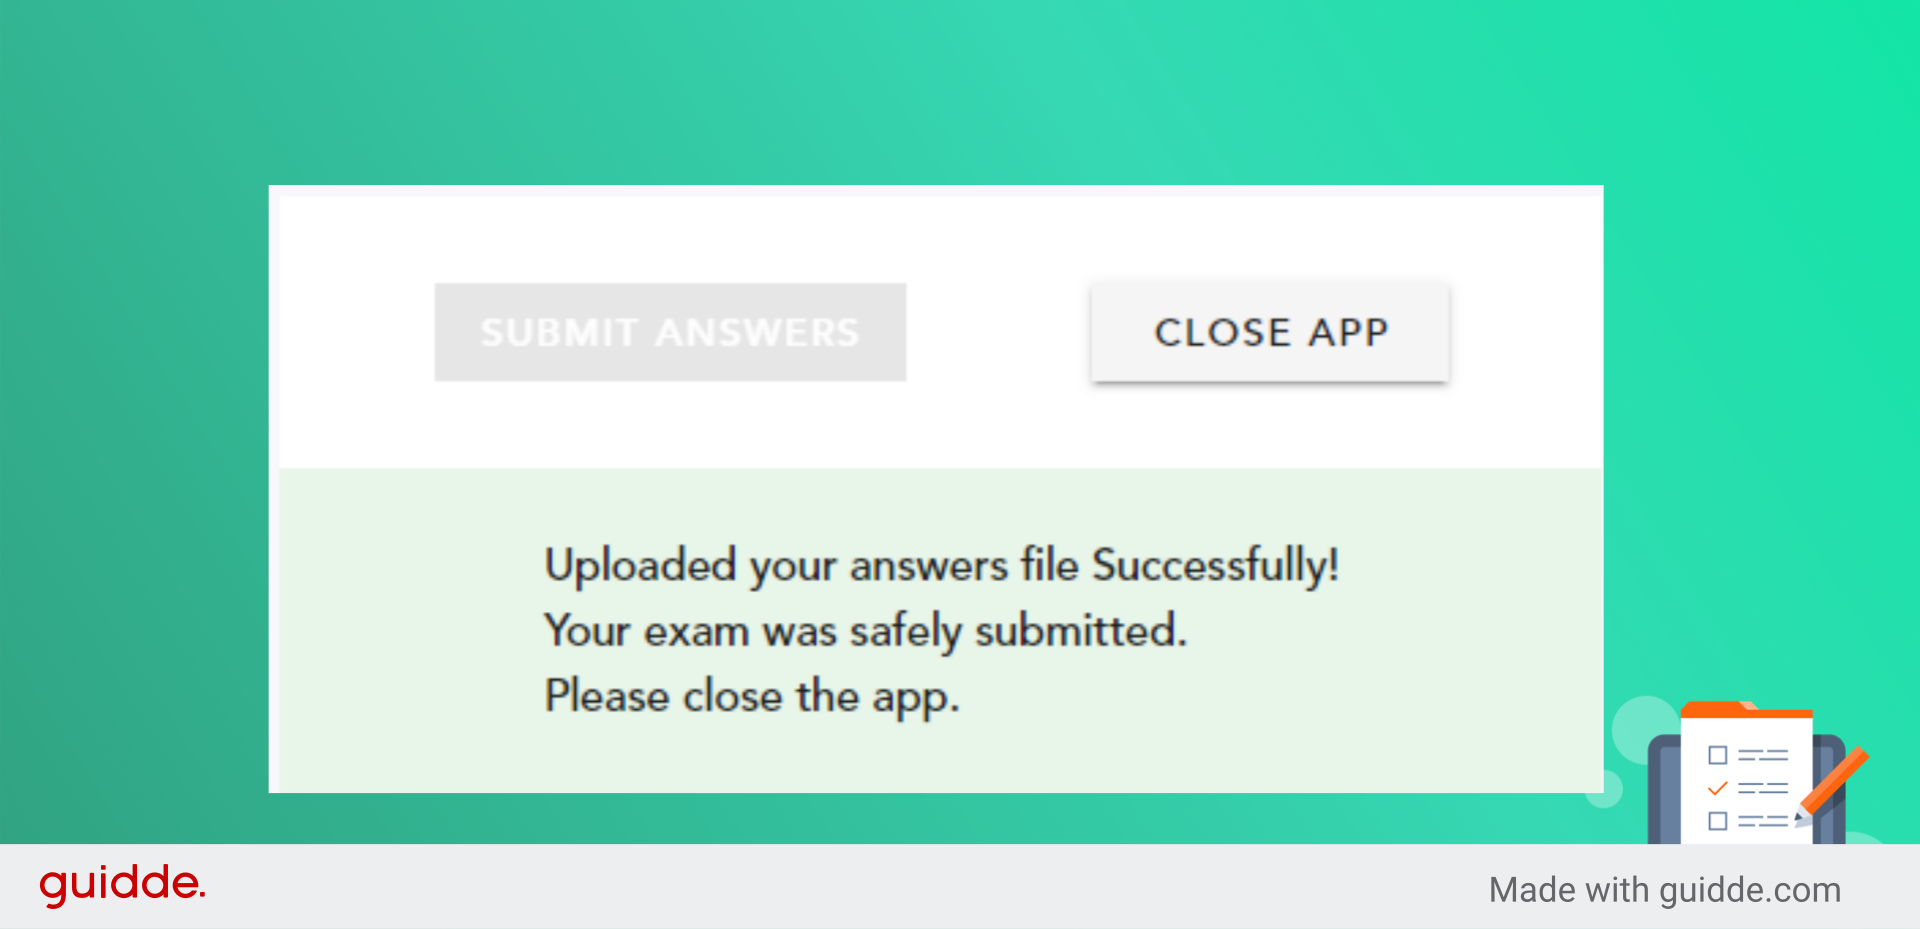
Until the closing date and time, the student will be able to login to a "late submission" mode. The app will locate the exam files on the student's computer and will automatically submit the content.
You can read here more about the student side
Back to the Monitor
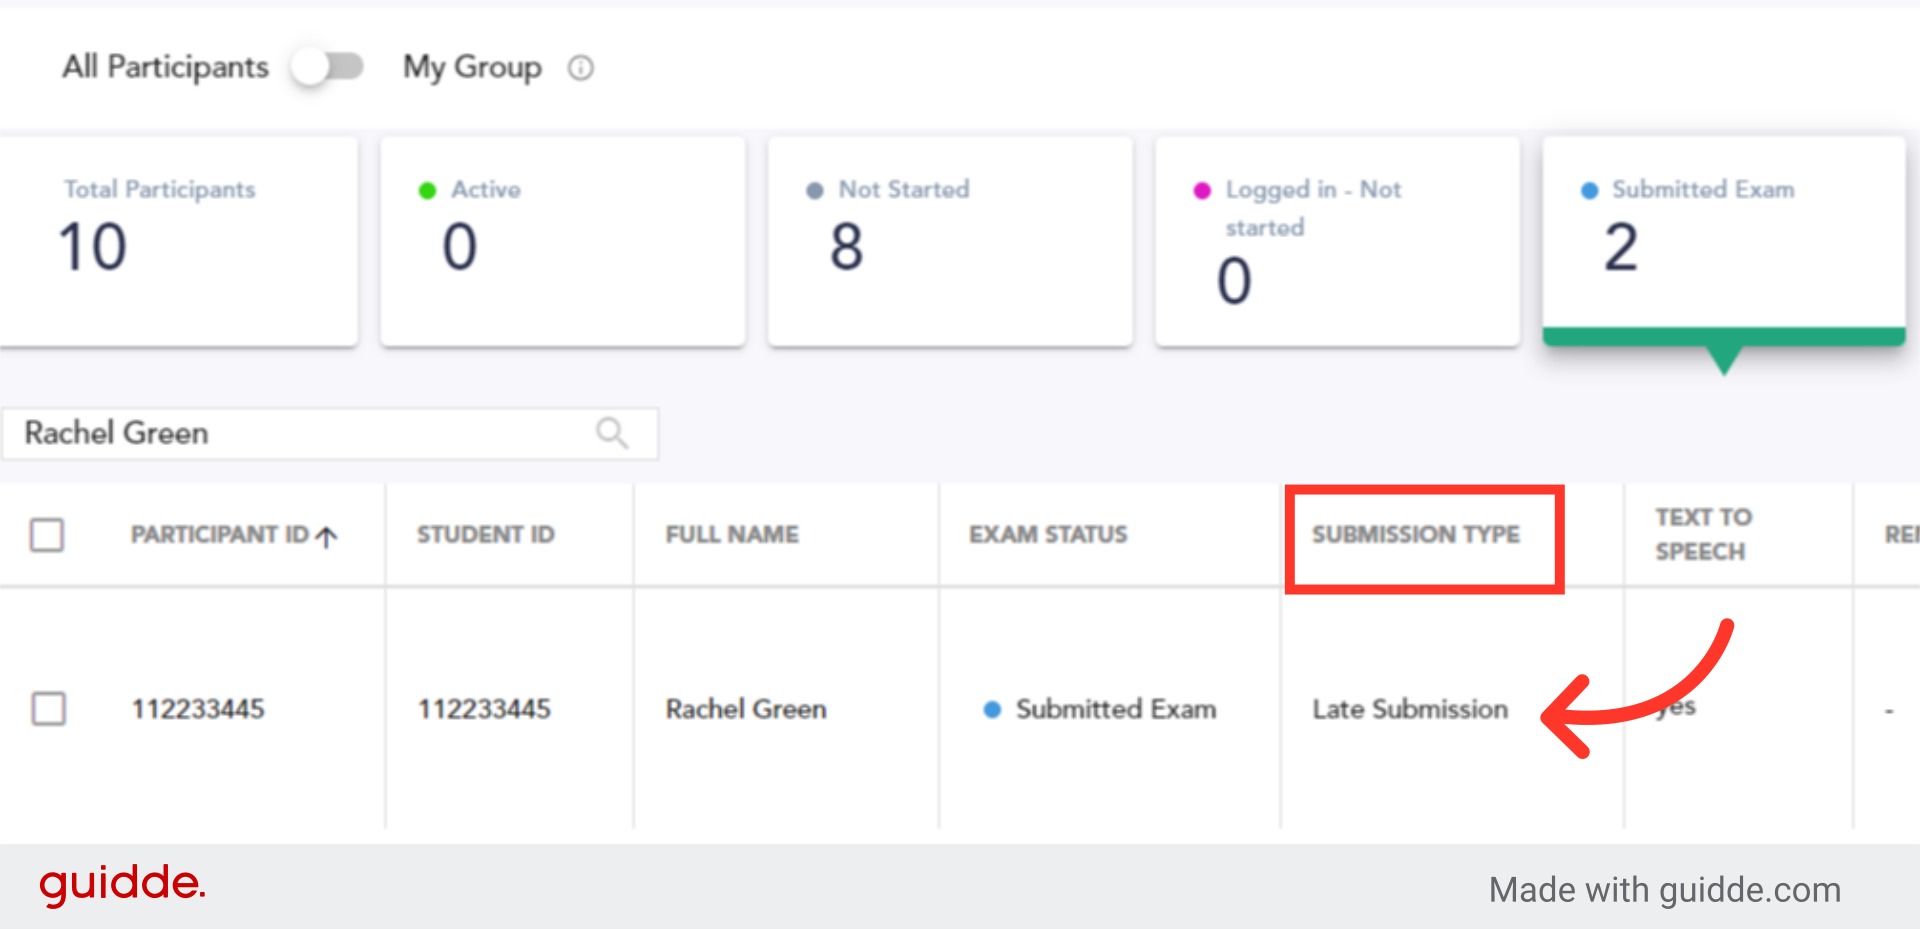
The exam status will change to "Submitted" and the Submission type will be "late submission"
After the student will submit, in the Exam Monitor the exam status will change to "Submitted" and the Submission type will be "late submission"